


Every autumn of my childhood in Australia was marked by something special: hot cross buns in my school tucker box (aka… lunch box).
Thank you for reading this post, don't forget to subscribe!Now flash forward to now, I’m on the other side of the world and it’s the bread that marks springtime.
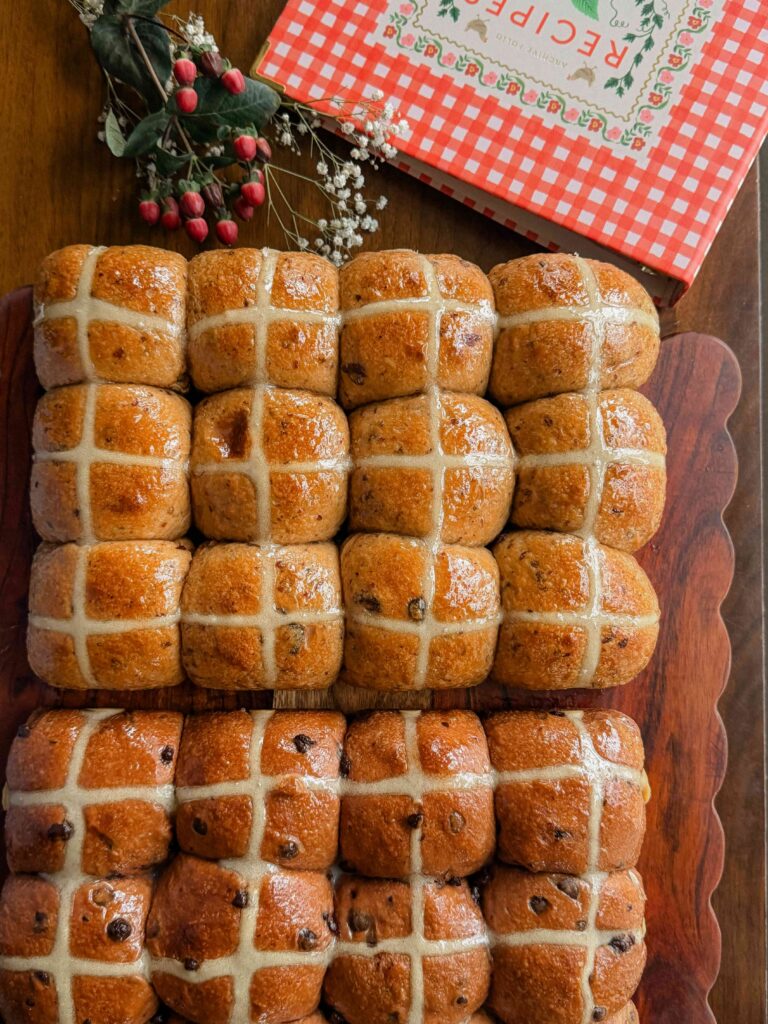
These aren’t meant to be a sickly sweet, heavy treat. It’s a light, brioche-style bun infused with raisins (or chocolate chips), vanilla, and spices. Decorated with a cross made out of a flour and water paste to commemorate the holiday of Easter, and brushed with a sweet glaze after baking.
And if you’re not a fan of raisins, not to worry. You can sub them for 160g of chocolate chips, just see the recipe notes for a few small tweaks to make it work 🙂
This recipe is 100% sourdough, so just a heads up, it takes a full 2 days to make as there’s a lot of waiting for it to rise. But my recipe has a suggested timeline to help you along!
I hope that these hot cross buns can wiggle their way into your home as an Easter tradition, just as they have in mine.
What Are Hot Cross Buns?
Hot cross buns have been around for thousands of years across different cultures and traditions. They’re typically made around Easter and are known for their soft texture, warm spices, and the signature cross on top.
2-Day Timeline (Quick Overview)
Day 1 (Morning): Feed your starter
Day 1 (Evening): Mix your dough
Overnight: Bulk rise
Day 2: (Morning): Shape, second rise
Day 2 (Midday or Evening, depending on proofing time): Bake
My Cottage Bakery Timeline for Bulk Baking
Day 1 (Evening): Feed your starter
Day 2 (Morning): Mix the dough, bulk rise
Day 2 (Afternoon): Shape, second rise overnight
Day 3 (Morning): Bake
Day 3 (Afternoon): Package and the customers pick up!
This timeline gives a shorter bulk rise, and a longer second rise. It works just as well as a longer bulk rise! I use this timeline to make sure I can have enough time to cool & package all the buns and give them to my customers on time.
Tools You’ll Need (Affiliate Links)
- Stand mixer. I love my Ooni Halo Pro Spiral Mixer!
- Kitchen scale (if you are a cottage baker and need a larger capacity scale, I recommend this one).
- 9×13-inch baking pan
- Bench/bowl scraper (not essential, but helpful, always, when handling dough).
- Piping bags
Watch the recipe video here 🙂
Sourdough Hot Cross Buns
Equipment
- 1 Piping bag
- 1 9×13-inch pan
- 1 Stand Mixer
Ingredients
The Dough
- 240 grams warm milk
- 500 grams bread flour can sub for all purpose flour if it is above 11% protein
- 10 grams sea salt
- 113 grams salted butter, softened and cubes (1 stick of butter)
- 100 grams active sourdough starter
- 50 grams sugar
- 1 egg
- 120 grams raisins, roughly chopped For a chocolate variation, substitute the raisins for 160g of chocolate chips.
- 1 TBS pure vanilla extract (1 TBS)
- 1.5 tsp cinnamon
- 1/4 tsp nutmeg
The Cross
- 100 grams flour, sifted
- 100 grams water
The Glaze
- 100 grams milk
- 100 grams sugar
Instructions
- In the morning, give your sourdough starter a good feed (50g warm water + 50g flour) so it’s happy, bubbly, and ready to bake with by evening.Evening: Prepare Ingredients. When you’re ready to begin the dough, soak the raisins with the vanilla, cinnamon, and nutmeg, and warm the milk on the stove (this will help speed up proofing time).*See notes for chocolate chip substitute instructions
- Mix the Dough. In a stand mixer with the paddle attachment, mix together the flour, sugar, and sea salt. Add the butter cubes and mix until the mixture resembles soft sand.Switch to the dough hook and pour in the warm milk, starter, and egg. Mix for 1–2 minutes, just until the dough comes together.Shape it into a rough ball, cover, and let it rest for 30 minutes.
- Develop Gluten & Incorporate Add-Ins. Once the dough has rested, add in the raisin mixture (liquid and all).Knead on medium speed for 7–8 minutes, until the dough is smooth and stretchy. If you can gently pull it thin without tearing (the windowpane test, pictured), it’s ready.
- First Rise (Bulk Proof). Cover the dough and let it rest for 30 minutes, then do a stretch and fold. Cover and let it bulk proof overnight at room temperature, until doubled in size and slightly domed.Note on Proofing: This is an enriched dough, so it will rise a little more slowly than your typical sourdough. The butter, sugar, and spices (like cinnamon and nutmeg) all naturally slow down fermentation.Don’t worry about it overproofing overnight; this dough is quite forgiving. If anything, you want to be sure it’s fully proofed, as underproofing is much more common here than overproofing.
- Shaping & Second Rise. The next day, turn the dough onto your work surface and shape it into a log. Divide into 12 pieces (roughly 95g each).Shape each one into a smooth, tight ball (refer to the video above), and place into a greased 9×13-inch pan (if the pan is not non-stick, make sure to use parchment) seam side down.Cover and let them rise at room temperature until noticeably puffy and doubled in size, about 4 hours. Take your time with this second rise. Depending on your dough and kitchen temperature, it may take a lot longer, and that’s perfectly okay. You’re looking for soft, well-proofed dough here rather than rushing the process.
- Baking & Finishing. Preheat your oven to 400°F (190°C).Prepare the cross paste by mixing the flour and water, sifting the flour first to avoid any lumps. You may need to add a little more water if the mixture is too stiff. Transfer to a piping bag and pipe crosses over the fully proofed buns.Place in oven and turn it down to 350°F (175°C). Bake for about 26-28 minutes, until golden brown and internal temperature has reached 190°F (°88C)While the buns are baking, gently warm the milk and sugar together until the sugar has dissolved.As soon as the buns come out of the oven, brush them with the warm glaze for a soft, glossy finish. Let them cool for 15–20 minutes, just enough to set, then enjoy while still warm and soft.These buns freeze wonderfully to enjoy for weeks to come.


